
TM 5-3820-246-14&P
Compressed air used for cleaning purposes will not exceed 30 psi. Use only with effective chip guarding
and personal protective equipment (goggles/shield, gloves, etc).
(4) Clean interior of fuel tank (2) with compressed air.
d. Assembly.
(1) If removed, install two screws (24) and brackets (25) on tank (2).
(2) Install packing (21) on fuel valve (18).
(3) Install fuel line (17) and fitting (16) on hose nipple (20).
(4) Install two packings (19), hose nipple (20), and fuel valve (18).
(5) Install filter (12) and fitting (13) on fuel line (14).
(6) Install fuel line (14) on fuel valve assembly (15) and install in fuel tank (2).
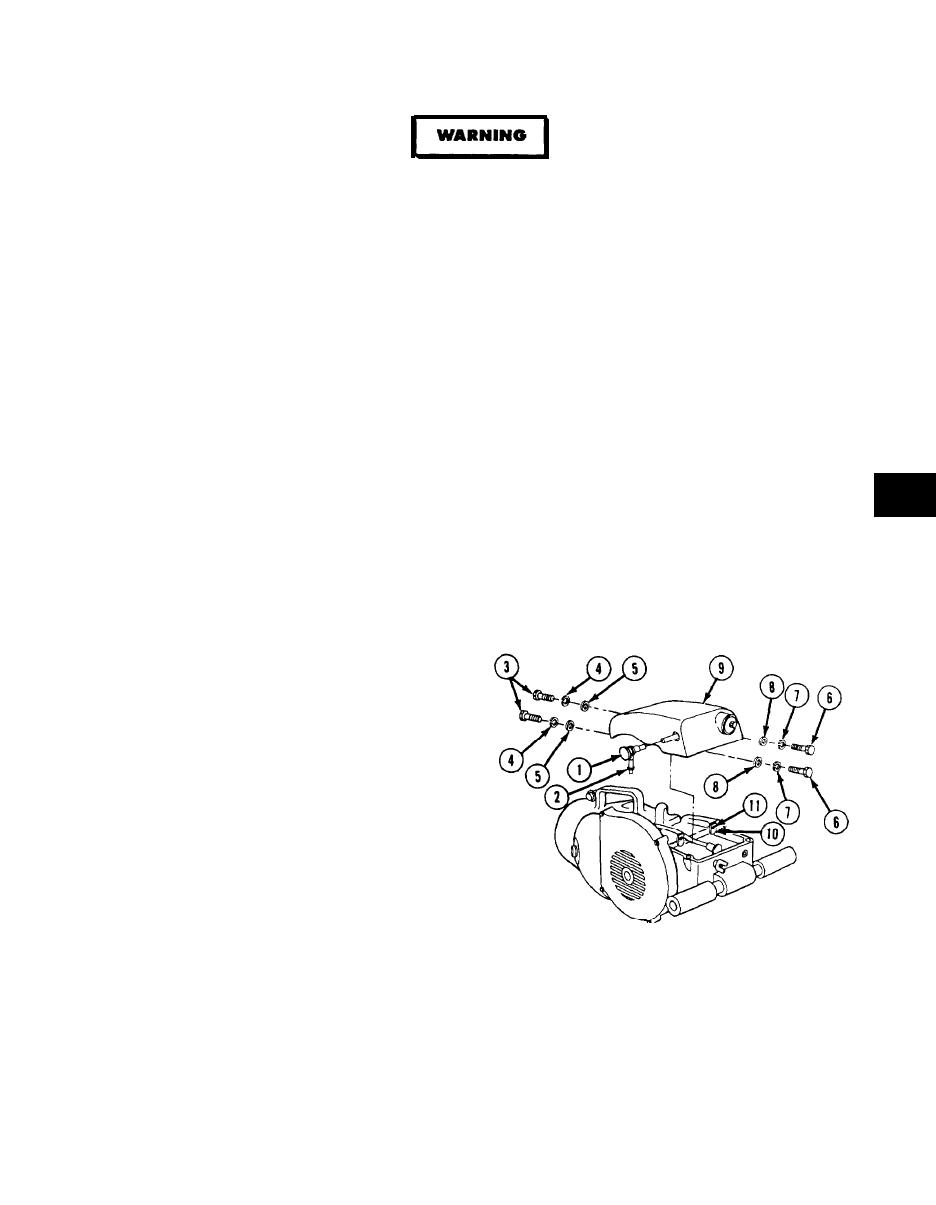
(7) Assemble tank cap (1) as follows:
(a)
Install spring washer (9), washer (10), and valve cap (8) on cap (11).
(b) Install packing (7), plug (6), lockwasher (5), and nut (4). Tighten nut 17 lb-in (1.9 N-m).
(c)
Install cap gasket (3).
(d) Install tank cap assembly (1) on fuel tank (2).
e.
Installation.
(1) If removed, install two brackets (10) with
screws (11).
(2) Place fuel tank assembly (9) in position and
install two flat washers (8), lockwashers (7)
and inner screws (6) using a 10 mm socket.
Tighten screws 10 lb-ft (14 N-m).
and outer screws (3). Using a 10 mm socket.
Tighten screws 10 lb-ft (14 N.m).
(4) Install fuel line (2) on carburetor by pushing down,
(5) Open valve (1) by turning CCW.
NOTE
Follow-on Maintenance: Fill fuel tank (para 2-8b)
END OF TASK
4-39
