
TM 5-3820-246-14&P
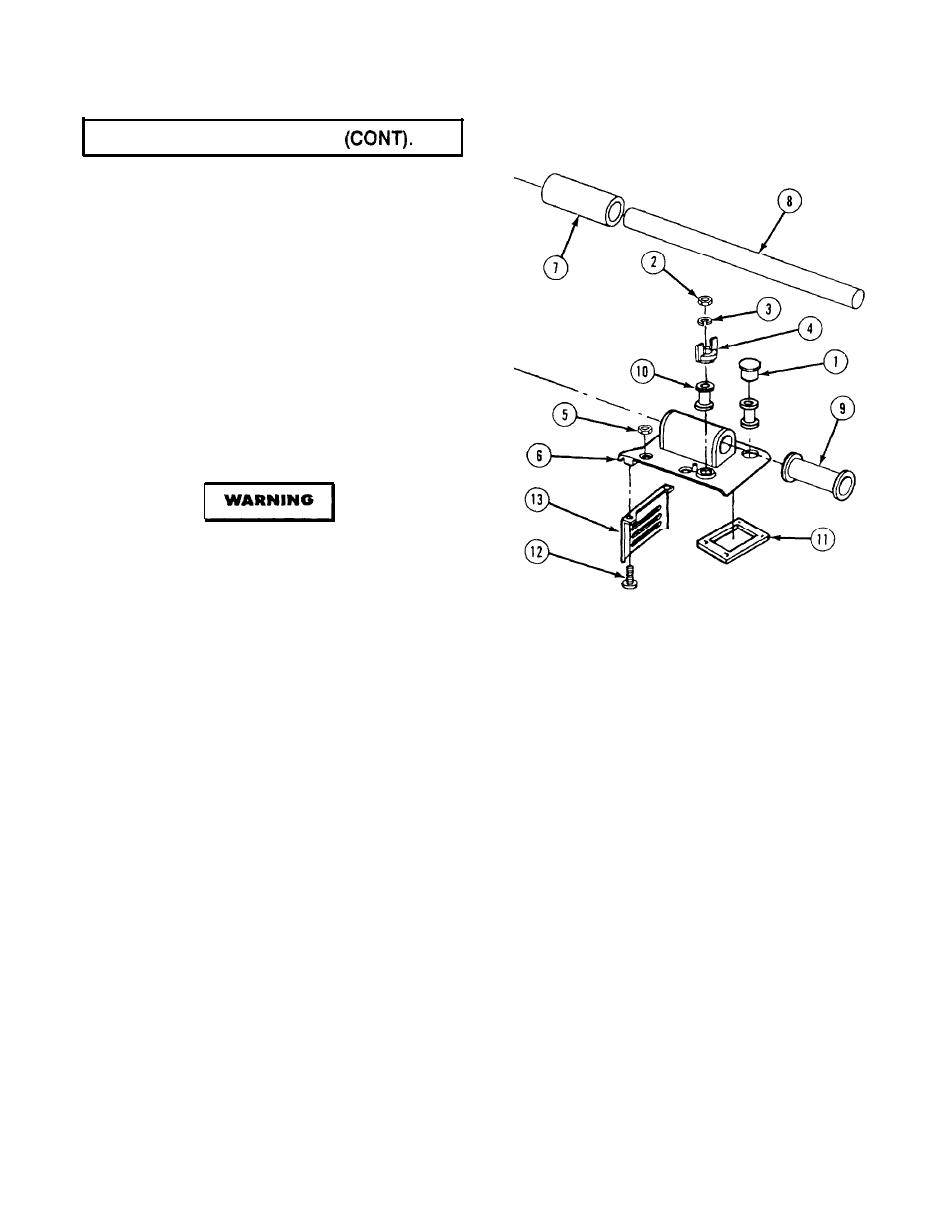
4-16. OPERATORS HANDLE
NOTE
Remove rubber seals and packing only if
replacement is needed.
(3) If necessary, remove and discard two rubber
seals (10) and rubber packing (11).
(4) Remove two screws (12) using 4 mm wrench.
Remove side cover (13).
(5)
c.
Assembly.
(1) Install side cover (13) and two screws (12).
Tighten screws 72 lb-in (8.5 N.m).
Adhesives, solvents, and sealing
compounds can burn easily, can give off
harmful vapors, and are harmful to skin
and clothing. To avoid injury or death,
keep away from open fire and use in a well-
ventilated area. If adhesive, solvent, or
sealing compound gets on skin or clothing,
wash immediately with soap and water.
(2) If removed, install rubber packing (11) with sealing compound.
(3)
If removed, install two rubber seals (10).
(4) Install bushing (9), handle pipe (8) and handle grips (7).
d. Installation.
(1) Install handle boss assembly (6) with four nuts (5). Tighten nuts 72 lb-in (8.5 N-m).
(2) Turn fuel knob stem (4) CW until it just seats.
(3) Position fuel knob (4) on stop so that wing of fuel knob contacts stop and that CCW rotation is permitted.
(4) Install lockwasher (3), and nut (2). Tighten nut 72 lb-in (8.5 N-m).
(5) Install throttle knob (1) using 2 mm socket head screw key.
NOTE
Follow-on maintenance: Install air cleaner cover (para 4-18).
END OF TASK
4-32
